Sunday, December 11, 2016

Better Late than Never

So.................................. some time in 2014 I had the opportunity to travel to Korea (of course for work).

Here are a few pictures of the most memorable, and by far, MY favorite place, in Busan, South Korea.
sometimes spelled Pusan, depending on who is writing it

Ladies and Gents,
        Welcome to the wonderful and amazing market of Busan "Busanjin Market"  <3


 There were five floors of household goods. 


Make sure you have a print out of the address in Korean (just in case you get a male cabbie or they don't speak English)


I had an amazing cab driver. I not only learned a couple of haggling words before I went in (thanks cabbie) but I received a little history on the market!! According to Mr. Cab driver, the Busanjin market is the "newlyweds market".  It is where a woman and/or her family would go to get anything she may need for her new home, or for her family to find fabric for traditional bridal wear. Double click the photo below to really see it, do it some justice.


Here is a terrible panoramic view of 1/4 of one floor. Lots of fabric and merchants to choose from, all within different price ranges.


These are Hanbok, traditional dresses. More and more women enjoy the western bridal look but there are still some that stick to tradition.


Not an Artist!


Hello all!  So being in the military I have had the opportunity to meet so many talented people, dancers, musicians, poets, writers, just true artists. Well I didn't really get the artistry gene (I can dance and sing.... not SANG.... just sing) but I try sometimes. Well recently my command held our annual children's Christmas party, they are always looking for volunteers. Last year I helped with the cookie decorating station, easy for me as a baker, this year I saw an opening for face painting. I jumped right on it and offered myself. 


Now you may be wondering, "why did you offer to face paint if you can't draw?" My response to that would be, "That is an amazing question that I don't have an answer for other than that fact that it was an exciting impulsive idea."  Now about 3 days before the party that question did finally hit me, like a sack of potatoes. No, Like a brick. No, I guess more like an anvil.... you know the cartoon AMC anvils that fall randomly from the sky and crush you! Well that happened! So I jumped into action, I found a lady in our area who does face painting purchased some supplies from her to practice, used a mannequin head I had purchased from the Daiso (Japanese dollar general) almost a year ago but never used and started drawing.


Thanks to Official Snazaroo YouTube channel I could at least draw a butterfly going in to the party event.
Not the best but this is how I looked after 4 hours. Yes I did this myself!
This was my I'm tired smile!


After that I just Googled  <- can this actually be used as a word?
By the end of the afternoon I had draw about 3 butterflies, 4 Christmas tree scenes (snow falling, snow on the ground, gifts under the tree), 2 gingerbread men, a princess crown, Santa hat, and a sad Pikachu. Now I did have the joy and opportunity to start with my own boys to practice (snowman and Pikachu).  Now for the adults that saw the Pikachu photo they immediately laughed and thought I was copying some Pokémon meme, unfortunately not so, just first time drawing Pika. Using mind you.. a Google search "how to draw Pikachu step by step".


As the afternoon went on I became a little more confident (stayed away from Pikachu or any real drawing) but my work got better. The kids were happy, the parents were happy, and I volunteered. So Yay!! <3.. never again though (face painting that is)! I will leave this to the professionals in my area!


My boys and two young ladies that let me take a photo!


I had fun, it was interesting and now I know face painting is not a strong suit for me. My boys had a blast playing in the fake snow snuck a photo with Santa and rocked out with their friends.
Super blurry on one side----photo of a photo! Snowman face paint going strong!


Always remember:


*Everyday you are living you will learn something new (big or small)
*Never be afraid to try
*You are never too old to learn/try something new!


***volunteer for things you KNOW you can do!*** LOL


From my family to yours Happy Chanukah, Merry Christmas, Happy Kwanzaa

Tuesday, December 6, 2016

Cheap mom Blue Velvet cookie style

So I decided allowing my twin boys to spend $2.50 daily on cookies during school lunch was getting expensive. That's $12.50 a week or $50 a month (if my math is right!) I don't know about you but that's ridiculous!!!! So I went on a hunt for fun and easy recipes.

I found a lemon cookie made with 4 ingredients (www.tastesoflizzyt.com) so I started wondering if it can be made with other flavors……well slap my knee, as I kept reading Lizzy clearly stated the concept could be used with other flavors! No more wondering needed.

4 "ingredients":  a box of cake mix, frozen whipped creme (I used fresh heavy creme), an egg, and powdered sugar(optional)

The hardest part for me was changing and finding the right temp for my oven. TIP-purchase an oven thermometer, your oven temp is not always correct.

I decided to use a blue velvet cake mix and………it was a hit!!!
My picky twin 8 year old boys loved them!!
YAY WIN!!!

Check out the link for the recipe.

Have fun and enjoy!

Monday, October 24, 2016

Chalkboard Wall

Chalkboard Wall


 For those who may not not know I am a military service member. I don't get much time to craft or sew, I am always on deployment, but when I can I try to craft for my minions. So this particular time I decided to not only make it something that could be fun, but something that could be meaningful. Being stationed overseas you can't always get what you want from the store but here in Japan, you more than likely can find everything you want and things you never knew you wanted. 

I went to a local store called Homes (like a Lowe's or Home Depot meets Bed, Bath & Beyond, meets PetSmart!). I went perusing down the isles until I found the paint. I wasn't sure at first what I wanted to do until I saw at least 4-6 shelves of chalkboard paint and 4 shelves of magnet paint <-- didn't know this one existed. So I picked up a small container of chalkboard paint and a cheap paint roller kit.

Don't be fooled by the English labels, the instructions are definitely in Japanese!


  So I began the process. Taping off the area, prepping the paint tray. No my boys' wall recesses for the closet doors so taping off one side was unnecessary. Begin to paint.....


TIP: Always cover the tray with a plastic trash bag of some sort. This makes for an easy clean up and the tray can be reused   
REMEMBER: Tape off anything you don't want painted (i.e Light fixture)

Give your self time to let each layer dry. Most of the posts that I read said to clean the walls first, I would agree with this statement to smooth out the wall(booger, sticker, tape removal) but if it is just marks, I don't feel it necessary if you are covering it with a dark paint color. 

Lay down at least 2-3 coats ***Always ventilate the room, open the windows turn on a fan.....***

TIP: Remove painters tape before final coat dries
In the end you and your loved ones will have fun writing on the walls. For me I get to leave love notes when I leave for work before they wake for school.


Friday, April 12, 2013

Out with the old, in with the new! (NOT!)

You used to always hear "Out with the old and in with the new" but why out with the old?
The way I see it your already attached to and comfortable with the "old", why not just spruce it up. (I'm talking furniture!)
I have one of the most amazing bargain hunters in my life, my grandma <3 My Aunt Franny and best friend Too Real tie in a close second.....
Anywho, before my birth my grandma searched and found a cute 5 drawer dresser for me. She and my mom cleaned it up and used it for years. As I got a little older my mom updated it, a little fresh paint and drawer liner.


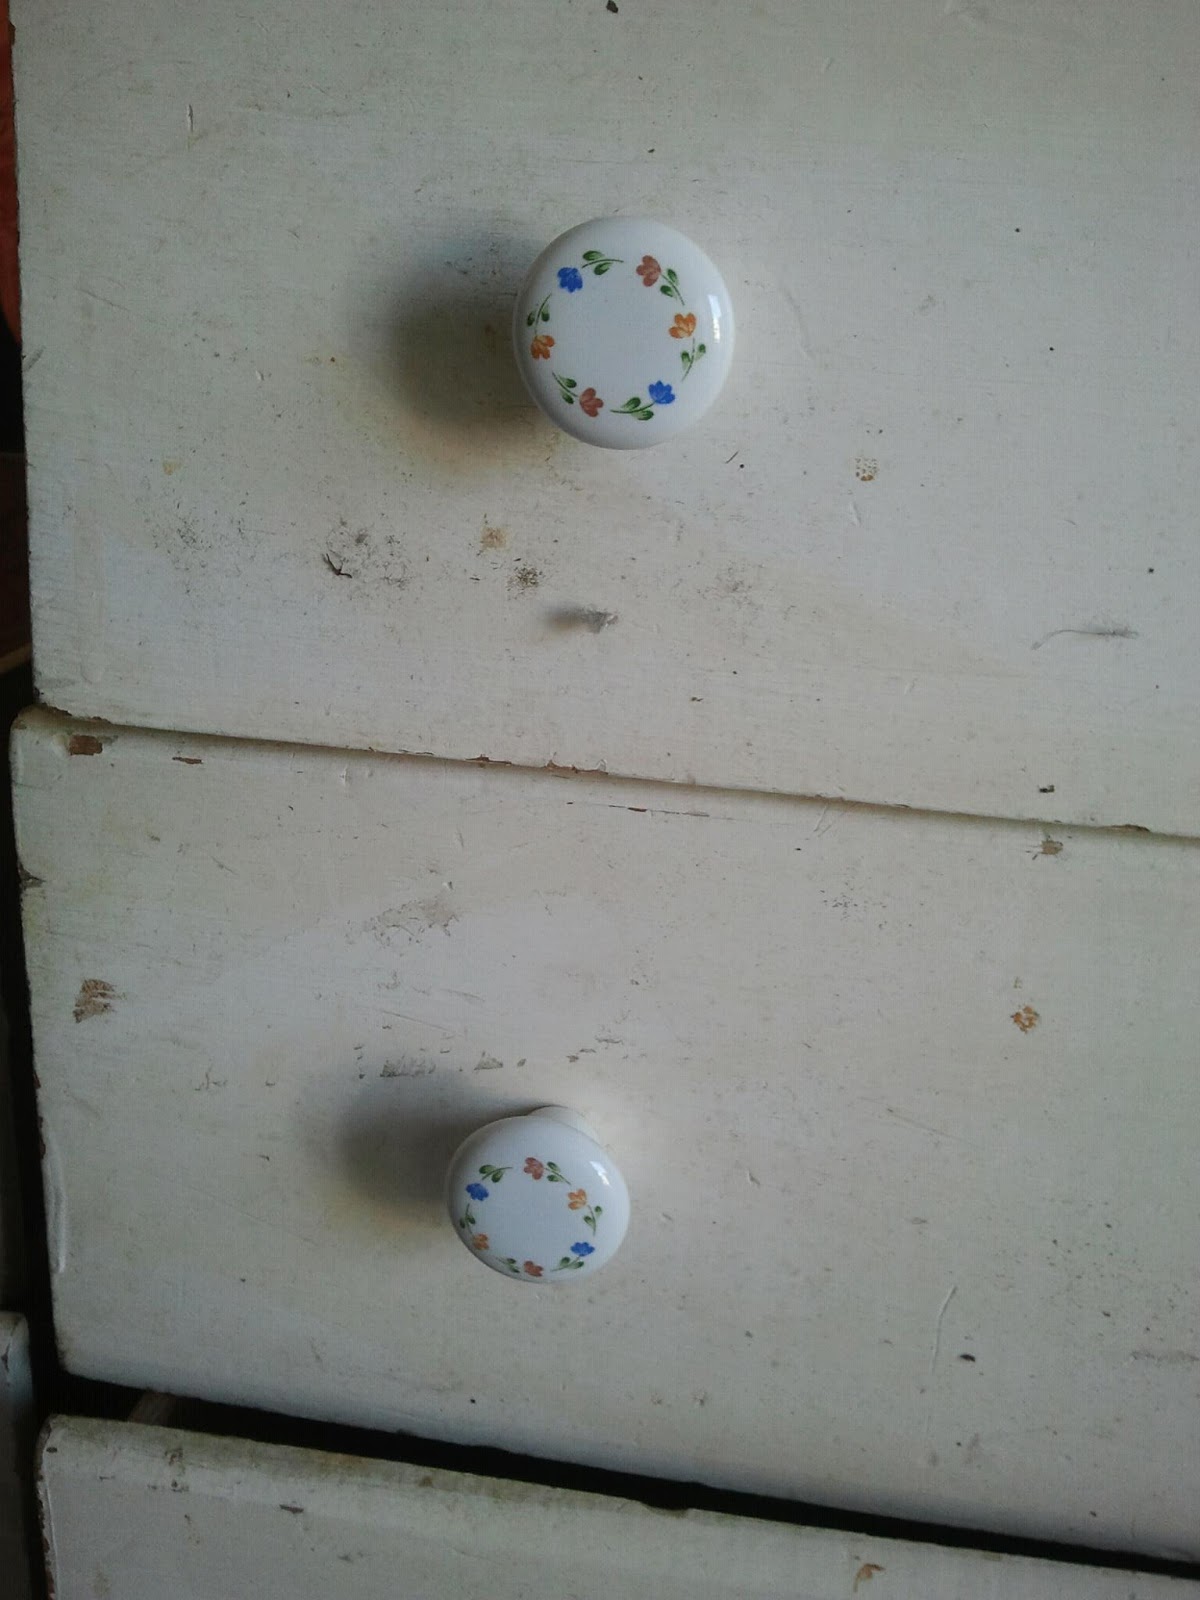
    THIS IS IT!! It is super simple but functional and cute. And they put the cutest little knobs on them.


Now luckily they decided not to glue in the liner other wise this project may have been a little harder, They used clear tape, the reason they chose to use tape is their own but in the end it was perfect for me.


So, first I went to Dollar Tree [favorite store ever!] and got a few things. To include:
paint scrapper
rubber palm work gloves
sand paper
paint brushes
shelf liner (non-slip)
drop cloth
and a few other things none of which were needed for this project.

I used the scrapper to get excess paint off the dresser, removed the drawers, then I sanded everything. After sanding, I brushed off the dust and wiped it down with a lint free cloth.

Then I laid out my drop cloth and started painting, main dresser first and then the drawers. Let dry overnight and added another coat the next day. 

                              
this is how it looked on day two, kinda looks like a robot. Ironic that I am putting the dresser through a transformation and it looks like a stick figure transformer. Well... I think so anyway... then again I am just a nerd.

After it completely dried, I coated it in Minwax Polycrylic, added non-slip shelf liner (in light blue and white) and added new knobs.


American Tradition (Valspar) satin paint in Blue Burst
and
Valspar Semi-gloss pain in Ultra White
(both of which my mom already had in her shed - she's awesome)
I got these knobs for less than a $1 from Lowe's, they are GateHouse 1.5 in concave knobs.

In the end a little elbow grease goes a long way. So, No! not "out with the old, in with new."
I say " Go with the old and in the end you'll have gold"

Saturday, March 9, 2013

Cricut fun

So for the last one and one half years I have owned a Cricut Create and did nothing with it. Well now I have! Thanks to my friend Jackie, I learned a few things, first of all I learned that I could connect it to the Cricut Craft Room which, for some reason, I thought only the newer ones could connect to the PC. Well I was wrong of course!

Here's a funny (not really) story!
I hooked up my Cricut to my pc after downloading the Craft Room and it said I needed to update the firmware. I attempted to numerous times, called the company- they had me load the old verion of the room, try a differnet browser and run through the update a few more times, bought and used a new USB cable.... IT DIDN'T WORK!
Asked Jackie for help.....
Turns out, like any other tech issue, it was an operater error. Wrong firmware (well right firmware wrong machine). Sadly I'm suppose to work in the IT field. :-(
End of funny story!

Anywho, I played around with a couple different cartridges just to get the hang of learning the buttons. I even had the chance to purchase some Heat N Bond iron-on fusible interfacing. So with all of that being said these are the sad thing I attempted to make my first go 'round.

The two items on a black background are adhered to black cotton fabric using the fusible interface. The others are on basic card stock.

Now I know how to use the machine and the software.

THANKS JACKIE!

Wednesday, February 27, 2013

Poppin Tags!

Poppin Tags!!
(not sure if rights are reserved to that saying... :-/  )


I am a super fan of Macklemore and Ryan Lewis, thanks to my good friend Too Real. After buying their album "The Heist" I fell in love with the song "Thift Shop". Too Real and I every now and then go 'diggin' through bins at the Goodwill Outlets to find either items for the family, ourselves or to use as fabric to craft. It's great you are not spending nearly as much money as you normally would but you are helping in return. There are some pretty awesome things in the outlet.

While I was there I found an older dress, green and cream(probably white at one time) picnic patterned dress. Of course when I saw it, I liked it for what is was, it screamed retro and that's my world. But when I got home I decided to hack it. Something simple since I am just getting into the sewing game. So I got home soaked it in baking soda water and then washed it. After dring I cut the top off, hemmed it and made it into a crop top. More than likely I will pair it with a pair of cream shorts for the summer or pants for the spring. Or maybe even a dark green pair of shorts.

yes it is a dark green,
I forgot to take a picture prior to cutting the top off!! (SILLY ME)

I may add some elastic to the hem to get a closer fit.

This craft was inspired by "Thift Shop" , Too Real and Refashionista